
7 Proven Drills to Increase Your Serve Power from Home (23+ MPH)
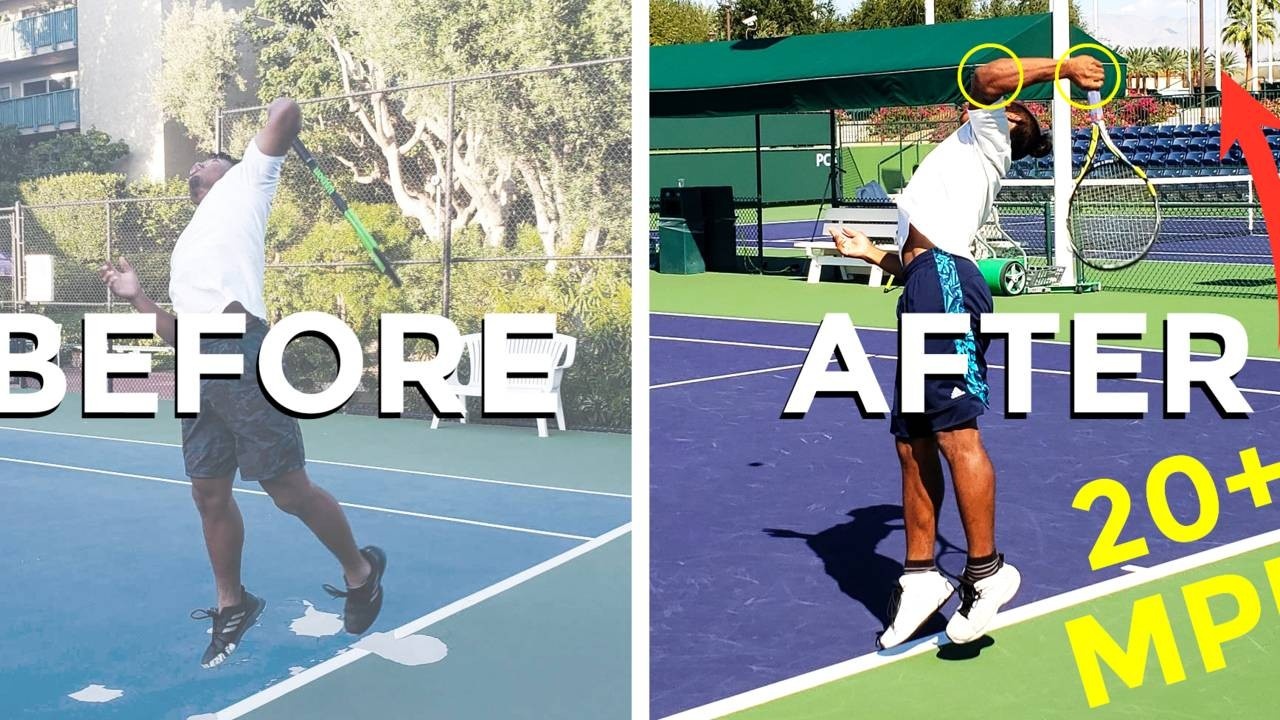
In today's video, we're going to be going over seven drills that you can do on or off the court that's going to boost your serve speed up at least 20 miles per hour and get your serve looking like this. Let's dive right in.
#1 Resisted Oblique Crunch
This is one of my favorite drills of all time that I work with my students on, especially when they have a problem over-rotating. If this is one of you guys, if you have a problem rotating in too much, I got you.
Typically what happens when you stand up to the baseline and you're trying to serve the ball hard, what happens in your brain, you think, "Rotate in. Rotate in." Because I want to drive the ball with a lot of force. While that is partially true, that rotational force does help to build racquet head speed, it has to be assisted with a second motion. When I'm crunching my left oblique muscle, take a look at what happens with my right shoulder. It drives up, and this is exactly the motion that happens on the highest level servers. What you'll notice is that they're hitting shoulder starts from a lower position to a higher position, almost like they're performing this cartwheel motion. A little known fact is that this helps to drive the racquet head down and build that racquet head speed up to contact. To get a feel for this motion, we're going to get a resistance band.
I have one conveniently placed right here. You're just going to step on it with your back foot, get in the serve stance just like this. Make sure to have enough resistance here, and I'll explain why in a bit. Let's start in the trophy position with your right shoulder lowered about 45 to 55 degrees, just like this and what you're going to do slowly, you're going to pull this. You're going to crunch this left oblique muscle here, just like that. You want to feel a tenseness in this specific region of your abdominals as you drive this shoulder upwards. So what you'll notice is this shoulder starts to go up as the left shoulder starts to drop and where I'll end up is lean forward in this optimal contact position, just like this. What you can start to do, once you get comfortable with that motion, is you can start to incorporate explosiveness into the shot, just like this. And then adjust the resistance band for more or less resistance as per your feel.
#2 Resisted Shadow Swings
All right, next up for drill number two, we're going to focus on some Resisted Shadow Swings. This is pretty straightforward. All you need is a racquet with a cover on it. If you don't have one of these, a plastic bag will do the trick as well. All you're going to do here is the start in your trophy pose again. You don't need a launch. You're just going to focus on some light shadow swings, just like this. What you'll notice is that with a little bit of cover like this, you're going to feel a little bit more resistance when you're swinging the shot. We talked about this in our last video. If you want to check it out, link down in the description, but this is going to create a little bit more of a drag in your swing, in your racquet while you're swinging. This is specifically useful because have you ever tried picking something up that's heavy, right?
Then right after, you pick something up that was light and it felt like you were picking up a feather, right? So our goal with this shadow swing here is so that by the time you take the cover off, you're going to be swinging like you're swinging a feather.
#3 Medicine Ball Drive Throw
All right, we're at drill number three. You guys are doing a great job. So remember the first drill we worked on? This time, along with the core rotation that we talked about, this left oblique crunch, now we're going to get a medicine ball and focus on coordinating the launch, that leg drive motion, with that crunch. All you need is a 4-8 pound medicine ball. This is a six-pound right here. All you're going to do is get into that trophy position again, just like this. What you're going to do is you're going to push this shoulder up while at the same time, coordinating the leg drive just like this.
All you need to focus on here. You don't have to throw it high or hard or anything right now. You're just focusing on coordinating. So think launch and drive that shoulder up here. Launch and drive. Boom. Now, as you get more coordinated and comfortable, you can start focusing on throwing it higher and focusing on how you land. Eventually, it'll start looking like this.
Now, before I get out of breath here, if you guys want to, if you have a partner with you, you can work on this with a partner just by throwing it back and forth. Again, don't focus on depth. Focus on height.
#4 Sock Swing Drill
All right. For drill number four, we're going to be using one of the most common household items out there. I'm sure you could find it scoured around your home somewhere. Yep, it's the pair-less sock. The spare pair-less sock that you have lying around somewhere. We're finally going to put it to use. Okay, so all we need here is two balls just to add a little bit of weight into the sock. Okay? Just like that. So all you need to do again to start here is to get into your serve stance and start your backswing and forward swing. Just like this. Backswing, forward swing.
Now, one of the best parts about using a sock is that it helps to coordinate your backswing with your forward swing. Specifically for players who have a problem starting their acceleration, either here where they're opened up or even worse from this back scratch position, just like here. If I start from here, it's much more difficult for me to generate that racquet head speed because I'm starting my acceleration much later. Compare this to if I were to start here, allowing myself ample enough distance to rotate down and back, taking my racquet diagonally down and back to build that racquet head speed. So this drill is going to be perfect for getting a sense of the rhythm of how you're going to start integrating the backswing, the arm fluidity, and the coordination of your shot. Just like this. Now a quick tip here is to make sure, as you can see here, I'm making sure to rotate my body away and in so that I can still make sure that my racquet head is going in the right trajectory.
What happens if you don't use the torso is again, my sock is going to go right behind my back and that's not a position that I want to be in for the serve. Instead, I want to flip it down and back by rotating away and making sure to get the right motions in my core before rotating in.
#5 Toss and Catch Drill
By now we have a lot more fluidity in the arm action. We know how to crunch our oblique muscles. We know exactly how to coordinate our leg drive with the torso rotation. Now we're going to focus on a little bit of that crucial contact point. One of the best drills for focusing on getting an accurate contact position is instead of using the racquet, use your hand to catch the ball. Now, this is accurate because I want you to start thinking of hitting your shots. Instead of hitting, instead of aiming for a target, I want you to almost think of it like catching the ball with the racquet.
Now that might sound a little bit woo-woo. Bruce Lee said this quote, and I'm going butcher it a little bit, but he said, "the hands do the hitting and you are merely the observer." All right, so having said that we're going to do a drill that I like to call Toss and Catch. Now for this, all you're going to do is toss the ball and catch it, just like this. Toss, catch. Now what you're going to start to notice is your body's going to start to automatically coordinate as far as the timing of your backswing and your body position at contact. Now, if you guys do want me to make a contact position video specifically on the serve, then definitely let me know in the comments below and I'll be happy to make a video. In the meantime, be sure to subscribe and hit the bell icon below to get notified of our upcoming videos soon.
#6 Through the Ringer
Once you get comfortable with tossing and catching and you're not missing as much and you're getting coordinated with the ball, just like this, next, we're going to move on to the contact and extension. So all you need for this drill is a string-less racquet. So if you have a spare racquet at home, you can cut the strings up and you'll do just fine, just like this. This is a popular drill, but I like to call it Through the Ringer and I'll show you why. All you need for this drill is to start with a couple of balls in one hand, and with your hitting hand, just hold your string-less racquet in front of your body like this so that you can focus on isolating this pronation supination motion. That's when the palm is going up to down. Now you're going to go here and toss the ball and try and get it through the racquet frame, just like this. Boom.
So all you're doing is focusing and visualizing hitting contact, which is exactly what you're going to be doing when you serve the ball. As you can notice, my hand and my arm are rotating outward, just like this. Almost like you're visualizing hitting outward instead of forward. So we're getting used to that pronation motion by rotating this in. Next, once you're comfortable with that, all you're going to do is get into your serve stance, and this time you're going to focus on tossing the ball and, starting from the trophy pose, focus on swinging through just like this. Don't worry if it hits you, it won't be that hard. Here we go. Straight through, just like that. This is going to get you to focus on your toss as well. Make sure that your toss, as you can see, is going in an arc to your left-hand side as well as in front of your body.
If you want to make this fun and add a little bit of a challenge, all you need here is a bucket of balls. All you're going to do is place it about in front of the baseline, a couple of inches in front of the imaginary baseline, and try and make it align with your left-hand side of your left shoulder here, just like this, so that you're tossing in the right arc. Now from the trophy position again, you're going to toss and try to get it into the bucket while at the same time, trying to get the frame through the ball. So you're going to focus on toss and contact. Here we go.
Ooh, that was close. Here, through both. Boom. Second try.
#7 Resistance Band Rotations
All right guys, we're here at last. Drill number seven. You made it and congrats. For this last drill, I'm going to keep it easy, but it's going to burn and you're going to love it. We're going to be focusing specifically on this internal and external rotation. What is called the Long Axis Rotation, where along with the pronation, you're going to focus on internally rotating, just like this, this hand and arm so that your racquet is pointed outward by the time you hit the shot. To work that in, we're going to be isolating the internal and external rotation that's responsible for driving that racquet back and forward. Along with strengthening this part of the muscle, it's going to help you prevent any injury that's going to come with trying to externally and internally rotate as you start to develop more power into your shot.
Let's get started by grabbing a resistance band, and all you're going to need is a pole to hold that resistance band. Okay, so as you can see, I don't have any pole around me so I'm going to have to get creative here. I'm going to use my human pole, [Daytri 00:00:11:17]. All right, now I have Daytri, the human pole. All right. Daytri, say hi. Okay, good. He's in character, I guess. Okay. So what we're going to focus on is that internal shoulder rotation, just like this, right? So you can have as much resistance as you need here, as you're comfortable with. Make sure that your joints are stable, just like this. Right? Good. Then once you're comfortable with that. Okay. Once you're comfortable with this internal rotation motion here, you're going to switch to the other side. This site is naturally going to be weaker because you're working on your back muscles and your rotator cuff externally and so you don't have the support of the chest muscles here. You can just grab one resistance band here, and you're going to externally rotate to about a little bit beyond 90 degrees, just like that.
You don't need to go too far back here just because you're working on strengthening, so here, and make sure that your elbow isn't moving away or moving forward through the shot. All right. Thanks, Daytri. Now, if you want to get true transformation from these drills and make these techniques last for when you're back on the court, instead of getting rusty the next time you step back onto the court, well, you're going to need a solid training system to get there.
Luckily that's exactly what we've designed here in our brand new course, Home Court Advantage. It's our absolute best work yet. In our serve module, we cover very crucial techniques like the three core motions, the exact way to release the ball to get it in a reliable spot, and the perfect contract position that's optimized for hitting the ball on a dime every time, even if you're under pressure. If you want to check out our best videos on the serve, as well as drills that accompany it, then you can check it out completely free of cost by clicking the first link in the description below. This is just our way of saying thank you from the bottom of my heart for sticking with us through these times. I wish you the best of luck and go out and train hard. See you in the next video.
Stay connected with news and updates!
Join our mailing list to receive the latest news and updates from our team. You'r information will not be shared.
